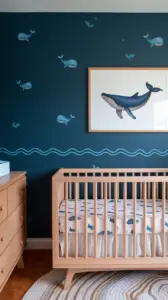
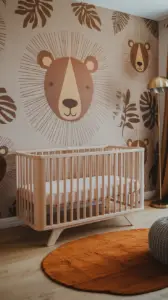
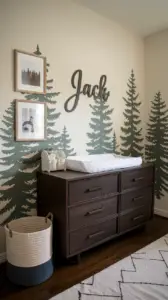
Have you ever come across a dusty, forgotten picture frame at a thrift store and wondered how to give it new life? The idea of upcycling thrifted frames and photos is a creative adventure that not only adds a unique touch to your home but also lets your family have fun crafting together. Whether you’re looking to enhance photo mats, decorate the frames themselves, or come up with artistic new ways to display your photos, there are endless ways to make these items stand out.
By reading this blog post, you’ll discover 25 exciting and accessible ideas to transform old frames and photos into delightful pieces of art that will brighten any space. Ready to roll up your sleeves and get inspired? Let’s dive in!
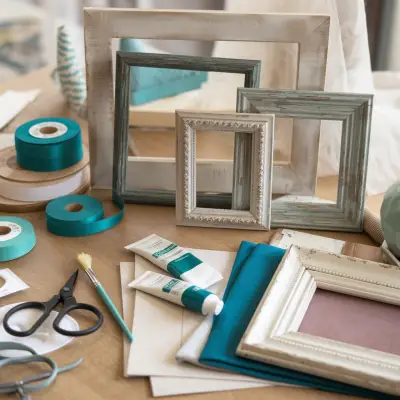
Upcycling Photo Mats
Photo mats don’t have to be boring backdrops for your pictures. With a little creativity, you can make them pop and bring out the best in your framed memories. Here are five fun ways to do just that:
- Wrap Photo Mats in Wrapping Paper
- Find colorful or patterned wrapping paper that matches your decor or the theme of your photos.
- Cut the paper to size and wrap the photo mat, securing it with double-sided tape or glue.
- This idea is perfect for seasonal decor—swap out the paper for something festive during the holidays!
- Scrapbook Paper Mats
- Scrapbook paper comes in endless colors, patterns, and textures. Choose paper that enhances the photos you’re framing.
- Layer contrasting or complementary colors for a more artistic effect.
- This option works wonderfully in a family room or child’s bedroom where fun, playful designs shine.
- Fabric and Fabric Scrap Patchwork
- Cover your photo mats with fabric, using spray adhesive to smooth out any wrinkles.
- For a patchwork look, piece together fabric scraps in coordinating colors and patterns. Stitch them together or glue them down before applying to the mat.
- This DIY project adds warmth and texture, especially when using materials like burlap or soft cotton.
- Acrylic Painted Photo Mats
- Grab some acrylic paint and customize your mat with bold colors, stripes, or polka dots.
- You can blend different colors for an ombré effect or use painter’s tape to create sharp lines and geometric shapes.
- Acrylic paints dry quickly, making this an ideal project for a short afternoon of fun.
- Watercolor Painted Mats
- Use watercolor paints for a softer, dreamier look. Try splattering paint for a playful feel or gently blending colors for a subtle, elegant effect.
- The translucent nature of watercolors gives your frames an airy and artistic quality that suits nature and family photos perfectly.
Transforming Thrifted Frames
Frames themselves provide a world of opportunity for creative expression. Here are ten ways to turn bland, old frames into striking art pieces:
- Washi Tape Wrapped Frames
- Washi tape comes in a wide range of designs, from minimalist stripes to floral patterns. Simply wrap it around your frame for a quick update.
- Mix and match different tapes to create stripes or borders for a layered look.
- This is a kid-friendly craft that’s simple to do and easy to change whenever the mood strikes.
- Ribbon Wrapped Frames
- Wrap frames with satin, grosgrain, or velvet ribbon for a touch of elegance.
- You can also crisscross ribbons over the frame’s corners or use them to create a delicate bow accent.
- This option works beautifully for wedding photos or special events.
- String Wrapped Frames
- Use jute twine, baker’s twine, or yarn to wrap your frame. Keep the wrapping uniform, or create patterns by varying the spacing.
- This rustic look pairs well with outdoor photos or black-and-white images.
- Embellish the wrapped frame with small charms or beads for added interest.
- Fabric Covered Frames
- Use fabric to cover the frame, attaching it with spray adhesive or a hot glue gun. Bold patterns or cozy textures like corduroy, velvet or flannel add character.
- Consider covering just part of the frame for a modern, asymmetrical look.
- This technique pairs well with vintage or farmhouse-style decor.
- Glass and Porcelain Mosaic Frames
- Break old glass dishes or porcelain tiles into small pieces, then glue them onto your frame to create a mosaic.
- Seal with grout and wipe off the excess for a stunning, high-impact frame.
- This method is messier but results in a truly one-of-a-kind work of art.
- Rock-Decorated Frames
- Collect smooth, small rocks or store bought stones and glue them around your frame. You can paint the rocks or leave them natural.
- This nature-inspired frame looks lovely in a garden room or as part of an outdoor-themed gallery wall.
- Wood Half Spheres
- Half sphere wood balls can be glued onto flat frames for a unique 3D effect.
- Paint the bobbins and frames with spray or acrylic paint any color you would like.
- Simple Spray or Acrylic Painted Frames
- Spray paint your frame a solid color for a clean and modern look.
- Use metallics for a chic vibe or bright colors to liven up a kids’ playroom.
- Patterned Spray or Acrylic Paint Frames
- Use a stencil and paint to create intricate patterns or textures on your frame.
- Patterns like chevron, checkered, or geometric designs give the frame an artistic flair.
- Make sure to tape off areas you don’t want painted to achieve crisp lines.
- Clay, Beads, and Mini Figurine Decorations
- Roll out air-dry clay to form small shapes like flowers, stars, or abstract forms. Once dry, paint and glue them onto the frame.
- Decorate with beads, small toys, or mini figurines for a playful and textured finish.
- This is an excellent craft for kids and can be easily customized for different themes, from superheroes to fairytales.
Creative Photo Updates
Why stop at just decorating the frames? Explore unique ways to enhance your photos and canvases:
- String or Wire Hanger Display
- Stretch wire or twine across an empty frame, then use clothespins to hang photos or jewelry.
- This display is perfect for an evolving gallery of family photos, art projects, or seasonal decor.
- Woven String or Ribbon Background
- Weave string or ribbon tightly across a frame’s backing and tuck in photos, postcards, or small drawings. Or leave it as is for a cool art piece.
- The woven texture adds a visual interest that makes even simple snapshots stand out.
- Painted Cane, Burlap, or Mesh Backing
- Replace the frame’s original backing with cane, burlap, or mesh, and paint it to complement your room’s color palette.
- The textured backing offers a rustic or boho look for any room.
- Painted Words Over Photos
- Use acrylic paint or paint pens to write meaningful words or funny quotes over a photo.
- Use bright colors and bold letters over neutral photos for and extra pop.
- Fully Painted Frame and Canvas Art
- Paint over the entire frame and canvas with one color to create a unified piece of art. And abstract patterns or brushstrokes to give a modern and cohesive look. If you’re a more skilled artist try flowers or a simple animal.
- This is ideal for transforming a photo into a mixed-media masterpiece.
- Painted Glass Frames
- Remove the photo mat and paint directly onto the glass of the frame. Leave parts of the glass clear or use a black outline first to create a stained-glass effect.
- Use translucent glass paints for a colorful, light-catching display.
- Flip the glass over for a clean look within the frame.
- Paint Over Photos
- Add little painted details to your photos, like tiny stars, flowers, or painted pants on a person.
- Let your imagination run wild and the options aren’t endless.
- Embellished Photos
- Glue embellishments like jewels, shells, or buttons directly onto your photos or blank canvas for a 3D effect.
- Have shells from your beach vacation or small rocks you’re child gave you? Create a special art piece for displayed memorabilia.
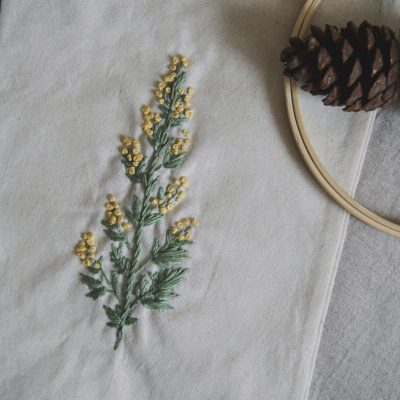
- Embroidered Photos or Fabric
- Add embroidered details to a printed photo or blank canvas for a textural, handmade element.
- Use simple stitches to outline shapes or add decorative patterns around your subject.
- Pin Board Displays
- Transform a large frame into a pinboard with cork backing covered in fabric. Use push pins to display photos, reminders, or your kids’ artwork.
- This is both a functional and creative way to showcase rotating items.
Ways to Display Frames
Think outside the box when it comes to displaying your newly upcycled frames. Here are some creative options:
- Mini Frames as Fridge Magnets: Attach small frames to magnets for an adorable fridge gallery of family memories.
- Hanging Frames with Ribbon Bows: Use wide ribbons to hang frames on a wall or door. Tie a bow at the top for a decorative touch.
- Gallery Wall Compositions: Mix and match frames in different sizes and colors to create a cohesive yet eclectic gallery wall.
Upcycling thrifted frames and photos is not only an eco-friendly way to decorate your home but also a fun and memorable family activity. With these 25 creative ideas, you can breathe new life into old frames and make your pictures shine. Try out a few of these projects, and let your artistic side run wild!
